Mini-DIY-Tutorial zur Vintage Kitchen Blog Tour: Setze Deinen Lieblingsstoff als niedliche Brosche, verstürzte Applikation oder süßes Haarband in Szene!

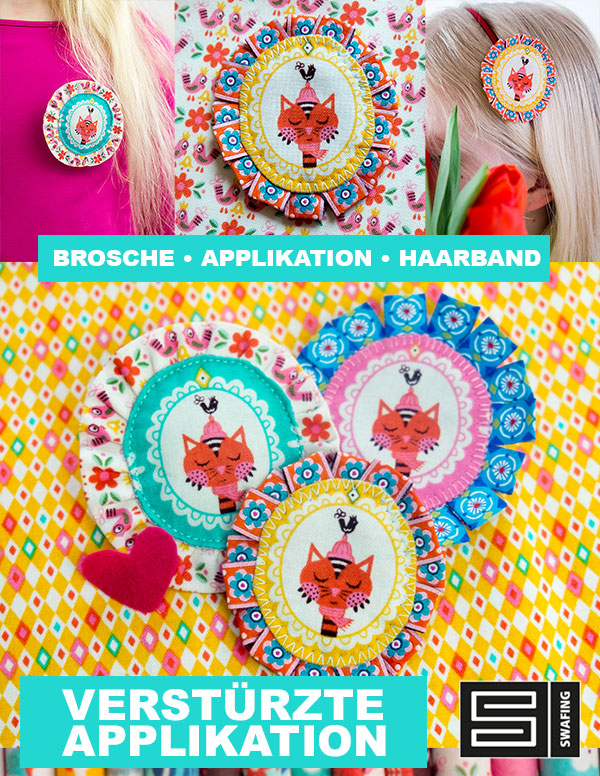
Verstürzte Applikation, Brosche & Haarband Tutorial
Wir lieben das Kitchen Cat Ornament! Für Applikationen aus Eurem Lieblingsstoff gibt es einen einfachen Trick, mit dem Applikationen in der gewünschten Form und mit perfekten Rändern leicht gelingen! Bei einer verstürzten Applikation gibt es keine offenen Stoffkanten, die später ausfransen können. Die Applikation kann dann ganz einfach aufgenäht werden oder mit Hilfe von Webbändern oder einer Rüsche zu einer niedlichen Brosche oder einem schicken Haarband verarbeitet werden!
Easy Appliqué, Fabric Brooch & Headband Tutorial
We just love this versatile Kitchen Cat medallion! To make appliqués from your favourite fabric with smooth edges that won’t ravel, there is an easy trick. This appliqué taken from „Kitchen Cat“ is quite the eye-catcher and is super quick to add. Using this idea, you can also make a fabric brooch or headband to pep up any outfit!

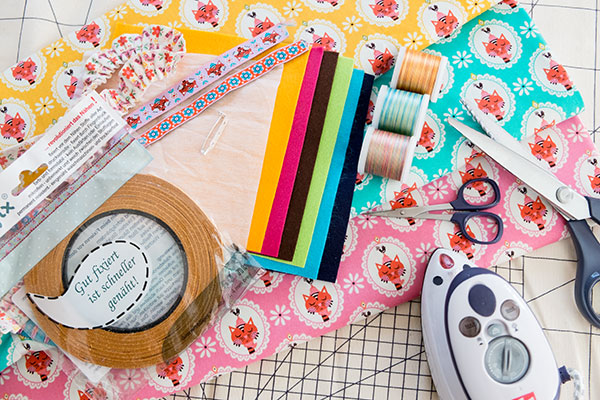
Du brauchst ein großzügig ausgeschnittenes Motiv aus Deinem Lieblingsstoff und eine leichte aufbügelbare Einlage (wir haben Vlieseline H180 verwendet), mit der der Stoff gedoppelt wird. Nach Belieben Webbandreste oder eine Rüsche. Für die Brosche Filz (wenn das Modell später gewaschen werden soll, empfehlen wir den waschbaren Swafing Stickfilz), eine Broschennadel und Stoffkleber oder Stylefix (doppelseitiges Stoffklebeband). Dazu Garn, ein Bügeleisen, Deine Nähmaschine sowie eine kleine spitze Schere und Deine Zackenschere.
You will need a generously sized motif cut from your fabric, light-weight fusible interfacing, a craft brooch pin and fabric adhesive or tape. Add a bit of ribbon if you like. If you plan to be able to wash your brooch, we recommend using Swafing’s washable embroidery felt. In addition, some all-purpose sewing thread, a pair of snippers, pinking shears and your trusty sewing machine.
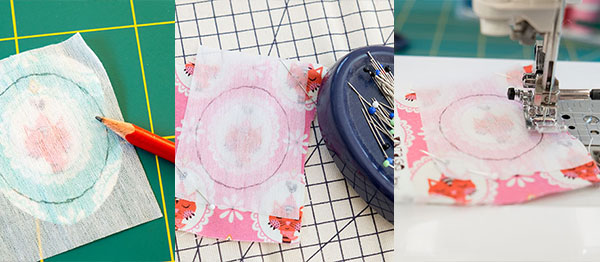
- Die Einlage auf den Stoff legen. Die rechte Seite vom Stoff trifft auf die beschichte „Bügelseite“ der Bügeleinlage. So ist die Bügelseite später außen und die Applikation kann gut auf den Hintergrundstoff aufgebügelt werden.
- Wer möchte, kann sich vorher mit einem weichen Bleistift die gewünschte Form als Nahtlinie auf die Einlage zeichnen.
- Rundherum aufnähen, eine Wendeöffnung ist nicht nötig. Wir empfehlen eine kurze Stichlänge.
• Place fusible interfacing on your cut fabric motif, with the adhesive side facing the fabric right side. Later, the adhesive side will be on the outside and you will be able to adhere it to the background fabric.
• If you wish, you may use a pencil to draw the stitching line on the piece of interfacing.
• Stitch all the way around the motif. Use short stitch lengths. There is no need to leave an opening for turning.
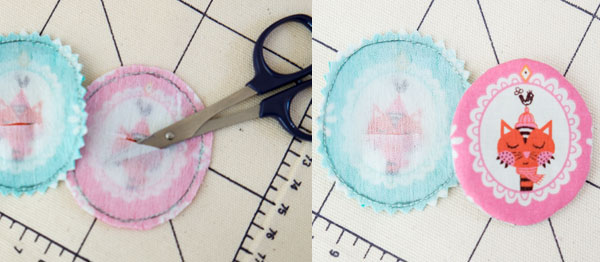
- Mit einer spitzen Schere vorsichtig einen kleinen Schlitz in die Rückseite schneiden. Hierdurch die Applikation vorsichtig wenden
- Jetzt mit einer Zackenschere die Nahtzugabe etwas zurückschneiden oder mit der spitzen Schere Nahtzugabe etwas zurückschneiden und an Rundungen in kurzen Abständen einschneiden.
- Mit den Fingern oder einem Stäbchen vorsichtig ausformen und die Nahtkanten mit dem Finger flachdrücken.
• Using your pinking shears, trim the excess fabric. Or trim using other scissors, and snip the seam allowance all the way around for a smooth turn.
• Using embroidery scissors, cut a small slit for turning in the interfacing. Turn your work carefully right side out through the opening.
• With fingers or the aid of a point turner, push along the seam to form a nice shape.
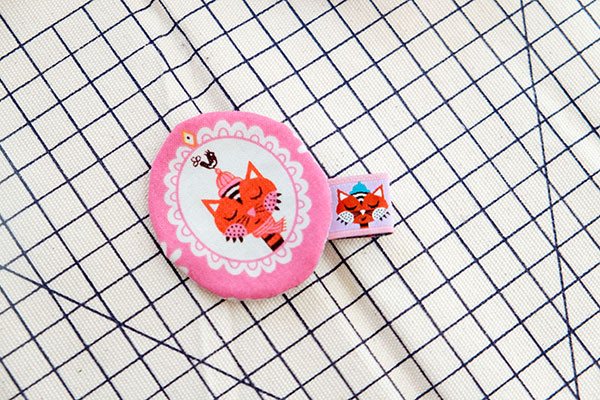
Jetzt kann die Applikation gut weiterverarbeitet werden: Bügelt die Katze auf ein Kleidungsstück oder ein Kissen, vielleicht mit einem Schnipsel Webband als dekoratives Element?
Now you can easily work with your appliqué: Press the appliqué to a new garment or pillow and add a bit of ribbon for an extra special detail before stitching.
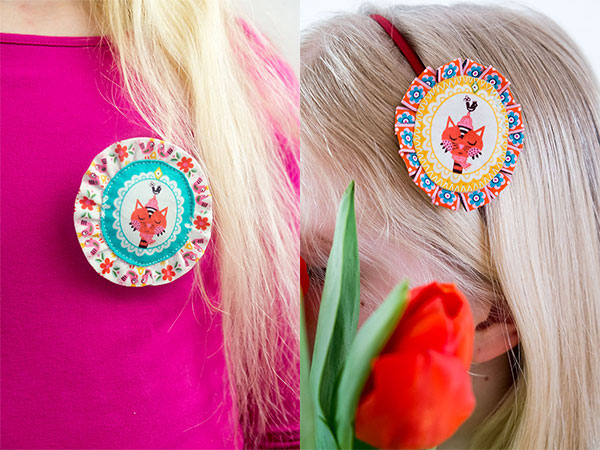
Eure ganz individuelle Brosche oder Haarband!
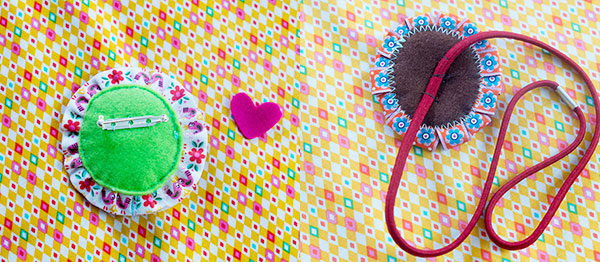
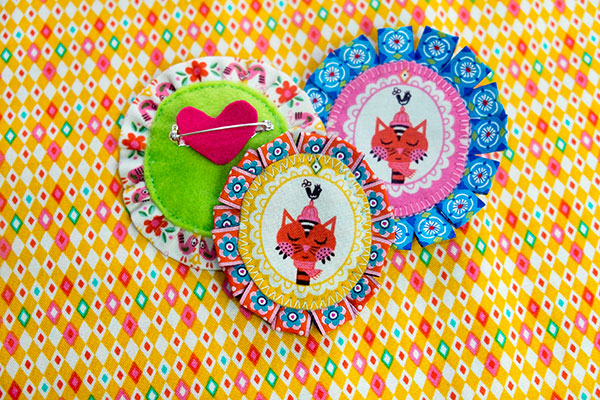
Für den Hintergrund der Applikation brauchst Du ein Stück Filz, das etwas größer ist als Deine fertige Applikation. Als dekorativen Rahmen haben wir hier ein Webband von Jolijou (via Farbenmix.de) auf dem Filz angeordnet. Auch eine Rüsche sieht süß aus! Damit es nicht verrutscht, kann man die Webband-Flaggen auf dem Hintergrund aufkleben. Das geht mit etwas Stoffkleber oder Stylefix, einem doppelseitiges Klebeband für Stoffe.
Sew a very special brooch! Here, we have added a bit of Jolijou woven jacquard ribbon (from Farbenmix.de) to frame the motif on a bit of felt. Or try an itty-bitty ruffle all the way around! So that the bits of ribbon or ruffle stay in place, you may use fabric adhesive, glue stick or two-sided textile tape to secure these elements for stitching.
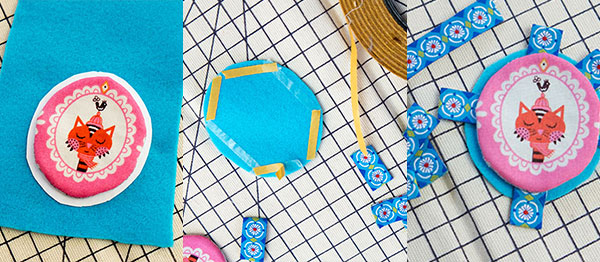
Wenn alles schön angeordnet ist, einfach das Katzenornament auflegen und festbügeln. Eventuell etwas Füllwatte unter die Applikation schieben, um einen 3D-Effekt zu erzielen. Knappkantig aufsteppen oder mit einer dekorativen Naht umranden.
Once everything is arranged the way you like on your background piece of felt, press the motif with the interfacing to the backing. Use zigzag or other decorative stitch to stitch the motif in place. For extra depth add a little batting.

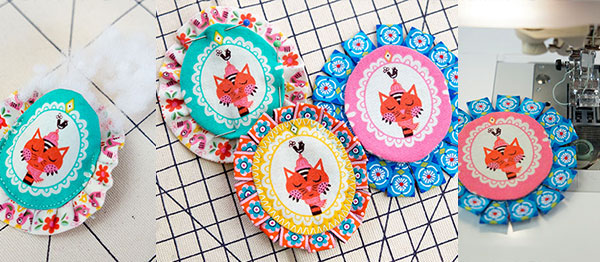
Den Filz auf der Rückseite eventuell etwas zurückschneiden. Eine Broschennadel oder ein Haarband annähen oder mit Heißkleber aufkleben. Beim Haarband vorher die Position überprüfen – das ovale Ornament wirkte am besten, wenn das Band leicht schräg angenäht wird. Wenn gewünscht, noch ein Filzherzchen aufkleben, um die Stelle zu verdecken.
Secure the brooch pin or the headband to the back needle and thread or with hot glue. Glue another bit of felt over the brooch pin backing to better secure the pin in place.
Fertig!
Viel Spaß mit Euren selbstgenähten Applikationen, Broschen und Haarbändern!
Have Fun with your Applique, Brooch or Headband!
Tutorial im Rahmen der Riley Blake Vintage Kitchen Blog Tour von Jolijou.